Wednesday, January 16, 2013

Throwback Throw-Pillow

January 15, 2013 -- Day 15
Hey Guys,

Today I am going to recycle another shirt. This is a great idea for shirts that you do not want to throw away for one reason or another. I am going to make a throw pillow out of my husbands old Beatles shirt.

**Update: apparently I forgot to hit publish yesterday. Sorry!**

What I used: a shirt, a rotary cutter, quilting square, pins, an old pillow, and my sewing machine.
First thing I did was I marked with the square and chalk where I wanted to cut:


I then cut it out and flippped the front so it was 'inside out'.


I pinned the sides together...


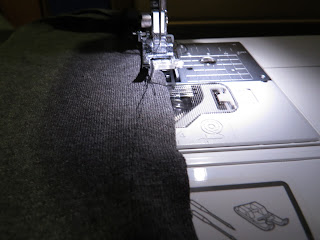
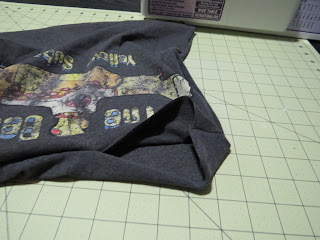
The I sewed three of the four sides all the way, and 2/3rds of the fourth side.


I turned the fabric right side out, so the picture was again on the outside. 

I took an old pillow, cut it open and started to pull apart the stuffing.


Make sure the stuffing is nice and fluffy, or it will make a lumpy pillow.


Stuff you pillow till it is the thickness your desire. Remember that pillows flatten so you may want to add a little extra for wear.


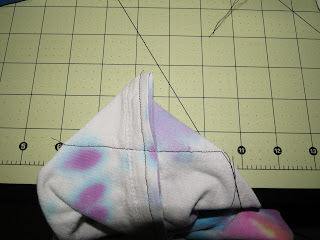
Here is the tricky part. Take the section that is not sewn and fold it in on itself. If you know how to do an invisible stitch do so now, other wise pin the pillow shut and sew. I like to start at the corner and go about an inch past the opening.


And your done. Your favorite t-shirt is preserved!!

I will be pairing this tee with about 9 other ones that my husband has worn out or out grew that I am turning into a quilt. I will post pictures when I get to that.

~Kelsy

Monday, January 14, 2013

Life hack Monday #2!

January 14, 2013 - Day 14
Hey Guys,
Today is Monday, and to make your Monday a little easier here is this weeks life hack. Not sure what a life hack is, check out last weeks hack. Today's hack is inspired from this pin:

genius right!! I have also seen this style shoe organizer be used for cleaning products, yarn, small toys... the sky is the limit! The hack I want to show you is something that I thought up all my own years ago. I live in a modular house, the only thing this means is there is no storage room at all!! (ok, maybe a little, but not much!) But to get great deals I do like to buy some things at my local big box store. Toilet paper and Paper towels are my favorite things to get there because they are good quality and good prices. The problem is where do you store that much paper towel or toilet paper?? 

And here is my hack for you!


 By using a vertical shoe organizer and filling it up with paper towel, toilet paper also fits, you can keep your shelve clear for other things. What I do is hang it just far enough from the wall that I can fit the packs of TP stacked beside it, the paper towel keeps the tp from falling. Using the vertical space in closets is a way to maximize the usefulness of the closet and cuts back on the clutter. This can also be used for bath towels, clothes, shoes (of course), and anything else you can think of! These organizers can hold more weight then you may thing, just be careful not to over load them. I had one that had 12x12 cubbies and stored scrapbooking paper and binders. It worked for about a year then it broke in half, made a mess and scared me half to death when it went. 

A bonus hack for ya, (as seen in the first picture of my closet) use pant hangers to hang your bags and stuff, it keeps the floor and shelves of you closet clear for other things. I also use climbing hooks(see below) to hang backpacks and other things that hangers do not work well for. I have wire shelves so I can usually hang several bags next to and in-front of each other, just make sure the bigger and longer bags go in back and the smaller ones in front, that way you can see everything you have.


My last tip for closets is while bins and stuff are great for keeping things looking clutter free, keep to smaller boxes and bins, because bigger bins just because collect all's and do not stay organized as well as small ones do, and make sure to label them. The fastest way for your family to undo your hard work is if they don't know where something is and they dig through everything to find it!

Well that does it for today! Come back tomorrow! 
Don't forget to leave a comment!
~Kelsy
P.S. What is your favorite organization tip or hack?


Sunday, January 13, 2013

T-shirt Recycled

January 13, 2013 -- Day 13
Hey Guys! 
Wow, that is a lot of 13's today!! Anywho... today I am going to show you a cheap, and easy alternative to those expensive store bought re-usable bags. This project will be more valuable to some then to others, for example, my readers from Bellingham that have to bring their own bags or buy bags when shopping, this will be awesome for you, for the rest of you, this is a cool way to be green, and will also allow you to use that t-shirt you have been holding onto for years on end, but can't really wear anymore. I am going to hold out on you to show you the final product!!

What you need: An old t-shirt, scissors, a large quilting square or plate, rotary cutter (optional- but suggested)


First take your t-shirt turn it inside-out and cut the sleeves off right at the seam, but keep the seam intact, this will reinforce the handles.


Your 'T' will now look like a work out shirt.


Take your quilting square, plate, or what ever you want to use and center it. This is going to create the opening to the bag, so make it as big as you see fit. I made mine a bit bigger so it will hold anything!


Use your rotary cutter, or scissors to cut out the shape. If you use scissors I suggest first marking where to cut first.


While it is still inside out, place or pin the bottom of the shirt together and hem it shut. It may be a good idea to do a double stitch at this point.


If you really want to get fancy, you can fold your corners and sew perpendicular to the hem line. 


And there you have it, a re-usable shopping bag. (Thanks to my cute husband for holding it up for me!)


Nice large opening to hold all kinds of good stuff!!


This would also be a great way to make candy bags for Halloween, gym bag, book tote. If you use a T-shirt without a picture, you can add one with the DIY screen printing technique we tried a couple days ago. The possibilities are endless!! Here is a pic of the original pin I saw.
 

Over all this was super easy. It would be great for the pre-teen and older age group, or anyone who can sew in a straight line. If you really wanted to get creaitive you could use the old sleeves to create pockets, or you can use ribbon to clean up the edges, but I think it is great as is!

Let me know what you think!
~Kelsy

Saturday, January 12, 2013

Painted Mason Jar

January 12, 2013 -- Day 12
Hey Guys!
I will be honest with you, I am gonna kinda cheat today. This is a craft I did around Thanksgiving when my husband was painting our house. It is simply a mason jar with paint. It is very self explanatory but I will go through the steps just in case.
First take a mason jar, any size will work. Take the lid off and choose your color. I chose the main color that we used in the living room which was also the accent color in the kitchen, as this was going to go in my kitchen.


 Next, pour about 2 tbsp (give or take depending on the size of the jar) of paint into the jar, and roll the jar around in your hands until the pain is covering the entire inside of the jar. As the paint dries the paint may settle from some parts of the jar, so you will want to roll the jar a couple times as it dries, or wait till it dries completely and do a second coat.


 Let the paint dry and your done! Use the jar to hold utensils, silk flowers, or just as a piece of decoration (that's what I do). I also used latex paint so I am pretty sure that if I ever want to change the color I can just peel the paint.

This is not a particularly fun craft, but it is easy and adds a pop of color where it is needed.
Let me know what you think!
~Kelsy
P.S. I have been getting a lot of questions as to how to subscribe to my blog. The easy answer is to check out my blog on your desk/laptop. For some reason there is no "subscribe'' button on the mobile app, just the full site (which is viewable from your phone). Hope this helps!


Friday, January 11, 2013

DIY Screen printing!

January 11, 2013 - Day 11
Hey Guys!
Today I am going to show you the quick and easy DIY Screen printing!! This is the pin I saw:

Their directions were to cut a shape out of wax paper, iron it to the fabric, paint, let dry, then remove!! Sounds easy and I will try their way just once I find my iron(I know, I know) but if you are like me and your iron ran away, or maybe you want a project the kids can do on their own? Here's what I did.


Choose your fabric and shape. I chose to use a heart. I used PostIt Paper, which is really hard to find any more but you can use any scrapbooking paper that has been ran through a sticker maker. You could also make a sheet of sticky paper by overlapping painters or masking tape.


Place the shadow of your shape on the fabric, and get your paint ready. If you do not have a foam brush or stencil brush use a rolled up paper towel! (as seen below)


Pat out the paint on the fabric, make sure to use a lot of paint but not so much that it will run!


Wait at least 10 minutes to remove the stencil, then let it dry completely. 


But there you go, easy DIY screen printing. Bust out your cricut and you can make just about any screen you want!! You can reuse your screen a time or two, more if you pin it in place. Over all this was incredibly easy and safe for the kiddos!

Let me know what you think!!

Thursday, January 10, 2013

Glowing Art that is Not Fairies in a Jar :(

January 10, 2013 - Day 10
Hey Guys!
Today I was going to do Fairies in a Jar as per requested, but I did not have glow in the dark bracelets like I though I did, so... Instead of one glow in the dark treat I though I would try a different one. I found this pic and decided to make a glow in the dark version:


What I used: A small cookie sheet, foil, wax paper, metal cookie cutters, glow in the dark beads. You may want to use tweezers to put the beads in the cutters.


Put the foil on the cookie sheet, then wax paper, this will allow the beads to come off without using oil or anything that will affect the colors of your beads. Fill your cookie cutters with the beads in any way you want I placed them so all the holes were face up but you do not need to do this, in fact if you do not want holes in your pieces then turn them to the side.


 Bake at 350 for about 30 minutes, or until the beads melt and fill the cutter. Make sure to keep a close eye, so the plastic does not burn or change color.


When the cutters are cool, remove the cutter from the melted beads, and the beads from the wax paper and there you go, glow in the dark art!! 


(Sorry, not the greatest pic)

 These pieces are very light weight, and could be used to create glow in the dark solar systems, or other pictures a child (or adult) may want to decorate with! Your imagination is the only limit to what you could do with these!! This is a very easy project and can keep the kiddos busy for hours as they design their art!

Let me know what you think!
~Kelsy
p.s. I will try and get glow in the dark bracelets asap so I can do "Fairies in a Jar" soon!


Wednesday, January 9, 2013

Cheddar Bay Biscuits

January 9, 2013 - Day 9
Hey guys, sorry its so late today, I am not feeling too great, but I got it done ;)
Today I made Cheddar Bay Biscuits, made famous by Red Lobster. This is the pin I found:

Looks good right!! Here is what you will need:

 2 c. Flour, 3tsp Baking Powder, 1 tsp Salt, 2 Tbls. Shortening, 1/2 c Cold water, 1 c Shredded Sharp cheddar cheese, 1/4 c butter (or margarine), 1 tsp dried parsley, 1/2 tsp garlic powder, and 1/2 tsp Italian seasoning.

 Mix the flour, baking powder, salt, and shortening. If your cheese is not already shredded, do that now. Once the flour mixture is consistent add the cheese, then slowly add the water. You should end up with little pill like chunks.


If your batter is too dry, as shown above, add a little more water (1 Tbsp at a time) until you get the right texture, as shown below.


Take the mixture out and knead it on a floured surface until it is all sticking together. 


Roll dough and cut out, place on a cookie sheet.


In a separate bowl, melt the butter and mix in the parsley, garlic powder and Italian seasoning, and spread it onto the biscuits.


Mmmmm... smell that garlic (my sister would approve!!)


Bake at 450 degrees for about 8-10 minutes


These do not taste exactly like the ones at Red Lobster, these are a little heavier, so next time I will not roll them out I will just section them out because with biscuits the less you handle the dough the fluffier they will be. I will also add a little more cheese (the original recipe called for 3/4 c. cheese) next time. Over all good recipe, this yielded about 14 biscuits for me, so I froze 6 of them for a future dinner.
Let me know what you think! Do you have a recipe you want me to try? How about a craft? 

Tomorrow I will do Fairies in a Jar as requested by one of you!!!